Friday, October 17, 2014

 The Result of "We are NEVER Having Chickens" 

I have wanted chickens for as long as I can remember  and my husband’s response was always “Never!”  Life was pretty busy with 3 children, so I pushed the idea aside.  About a year ago, I stuck up the campaign again and this time found him to be more agreeable!  

At first, he said I could have chickens if I could build the coop - and since I'm no Bob Villa -  I decided to start looking for pre-assembled chicken coops on-line (ha ha!).  When my husband saw the prices, he decided that we could do a better job ourselves!

This little three-sided shed has been on our property since we moved to our house 20+ years ago.  One day early this Spring my husband said we could  make a pretty nice chicken coop out of it.  


So the construction begins…….Floor installation.....


Inside the coop - 'our side' up front and 'their side' in the back.  Since I work full time,  I knew I'd have limited time the mornings to check on the girls.  We built a 2-room coop so I could gather eggs, store food and check on the chicks without walking through the mess!


Knowing the construction would take a few weeks, I planted our summer crop of corn where the outdoor chicken run will go.....  Outside door and front window are installed.


The nesting boxes go in.  They were built so egg gathering can take place on 'our side'.


Nesting boxes on 'their side'.....


Linoleum floor and clean out doors (flush with the floor) for easy clean up. 


The outdoor run gets started.......the chain link fence and gate were part of a dog run we weren't using and the posts left over from a fence project we did a few years ago.  Wood siding on the coop takes place of the old tin siding.  My husband owns a glass shop so the windows, outer door, and screen door all were from his 'bone pile'.


I wasn't originally a fan of the yellow paint (on sale) but have grown to like it a bit.  We added shelves for storage.  Chicken wire divides 'our side' from 'theirs'.  Window will be installed in the back for cross ventilation.  


The roof of the outdoor run is almost finished.  We re-used the corrugated tin from the original shed siding.  


Solar panel installed for a bit of light in the evening.  I'm amazed at how well it works!


The finished product!  The chicken door can be opened and closed from outside the coop.  The girls love their new home and it's easy to maintain and looks beautiful!


I'm so grateful for my husband's talent, hard work and especially for his love and acceptance of my desire to have chickens.  We both enjoy checking on the girls after work and get a few laughs at their unique personalities! 

Monday, September 15, 2014

A Wedding Gift - Flowers for My Niece

A Wedding Gift for My Niece

I love to garden!  It's become a bit of an obsession for me and although I'm no pro, I somehow worked up the courage to offer to grow flowers for my niece's wedding.  I was honored when she agreed and so we started started the planning (and planting) process!

January - The planning begins! 
The big day is only 140 days away - June 21st!!

After looking through gardening books, magazines and seed catalogs these were just some of the flowers that Kirsten and I selected: 


b Zinnias A Scabiosia Queen Anne's Lace
o Stock v Lisianthus A Love in Mist b Feverfew
b Poppy Cosmos vCelosia

My garden journal lists the flowers by name, height, days to bloom, and color.


February - seedlings are started indoors and new outdoor raised 

beds are constructed - the future home for all of these flowers.


March - The outdoor planting begins!  Just to be safe, several 

varieties were directly sowed outside  and hoop houses constructed 
over the raised beds.


April - The wedding flowers all tucked away in their own little mini 

greenhouses!

May - The flowers are coming along nicely!!  Every day the sun is 

shining is a good day!!  Our spring was a little lacking this year!  For late 

summer interest (after the wedding) hog panels were added to the 

rows of the raised beds and small pumpkins and gourdes will grow up 

and over them..


June 21st - The BIG day!! - my mom and daughter were there to lend 

helping hand with the cutting and arranging. Our yard was bursting 

with flowers with color!  Not only were the flowers that were grown 

for the wedding ready, but we had plentiful perennials from our garden

flower beds!  


The centerpieces turned out beautiful!! 


Wedding Day - My beautiful niece and her new husband


And a little side benefit - I get to enjoy the flowers all summer long!


Thursday, March 6, 2014


"If we had no winter, the spring would not be so pleasant."                                      Anne Bradstreet


Snow Surrounds
Yellowhawk Creek
We live in the beautiful northwest.  Our zone 7 garden experiences all four seasons - one of the reasons we love living here!!

This winter brought about 10 inches of snow. Not nearly what other parts of the country are experiencing - but enough to make us long for spring.


Last Thanksgiving I decided to experiment with some winter gardening.  My thrifty husband found this cold frame at a local discount store for $10.  I wasn't all that fond of it until we discovered it had self-opening hinges. When the weather reaches about 45 degrees, the lids open automatically and then close when the temperature drops.  Pretty fancy! So, we planted several short rows of of lettuce and spinach and patiently waited.


We've had just enough sun-filled days since Thanksgiving to give these greens the warmth they need to sprout and start growing.  We're be looking forward to an early spring crop!

I spent the winter reading Niki Jabbour's book "The Year Round Vegetable Gardner" (a Christmas gift from my son!) I read the book from cover to cover (a first, as I'm usually a 'skimmer').  What a great gardening book!  Although I can't wait for Spring to arrive, I must admit that I am also anxiously awaiting late Fall so I can experiment some more with preparing the garden for winter's bounty!


Although the snow here has melted and the weather predictions call for warmer temperatures this week, it was nice to have Mother Nature bless us with a bit of snow to remind us that every season has a purpose.  

Wednesday, February 19, 2014


Creating My Garden Journal

Patience is not a virtue that comes easily to me.  I'm an instant gratification kind of girl! I love trips to our local nurseries and..... (I hate to admit it).... the big box stores.  I am an impulse buyer when it comes to the garden and you can often hear my husband ask me "where are you going to plant that?"  More often then not, I have not a clue! Temporary housing is no stranger to my recently purchased perennials! With all of this 'buying on the fly", I don't always remember the characteristics of each plant.  Thank goodness they come with these great little tags that can jog my memory and help me take good care the newest member of my garden family!  Now for the million dollar question.....how to organize all of those garden tags?


One of my goals as a gardener has been to create a garden journal.  What better way to organize all of the garden tags I've been collecting over the years!  Because I am no artist, I knew that I wouldn't be able to create a journal filled with beautiful plant drawings and poetic garden quotes. Since garden seasons change from year to year I wanted to be able to easily look back and reference what I planted and when; what bloomed and was harvested (my veggies!); and whether the day was filled with beautiful blue skies or covered in snow.  I decided that a perpetual garden journal was just my style.  A perpetual garden journal is 1 page per day of the year - dated with only the day of the month (i.e. June 2nd).  In the left hand margin of the ruled pages, I enter the year and then make my notes in the body of the note paper.  This allows me to see what happened on the same day of the year - each year!

Since I wanted to be able to take the journal into the garden and greenhouse it needed to be durable and basic enough that a few smudges of dirt or water droplets wouldn't ruin my records!  A simple 3-ring binder filled with college ruled notebook paper was just the answer!  This way I could insert great garden ideas (thank you, Pinterest!) and add photos/pictures (in sheet protectors) or maps of the garden (on graph paper).  


After I decided on a perpetual journal, I was still struggling with how to store all of those garden tags!  A quick trip to the office supply store solved my dilemma!  Since garden tags typically have the picture and plant name on the front and the instructions and plant traits on the back of the tag, I needed a storage solution I could see both sides of the tag.  Rolodex / Business Card Holders were just the answer!  They are similar to sheet protectors but have individual 'pockets' just about the right size for my garden tags (although I did have a bit of trimming to do).  


Next I alphabetized the tags ..... and considering my history of adding flowers to the garden 'willy-nilly" ..... and given that Spring is just around the corner... I thought I had better leave a few of empty pockets so I could easily add new garden tags!! 


I feel so organized and ready for the upcoming garden season!  Whatever your journal style, I hope you find a system that suits your needs and expresses your individuality!

"I must have flowers, always, and always."                                                         Claude Monet

Thursday, February 13, 2014

"I'm Expecting Great Things in the Garden this Year"

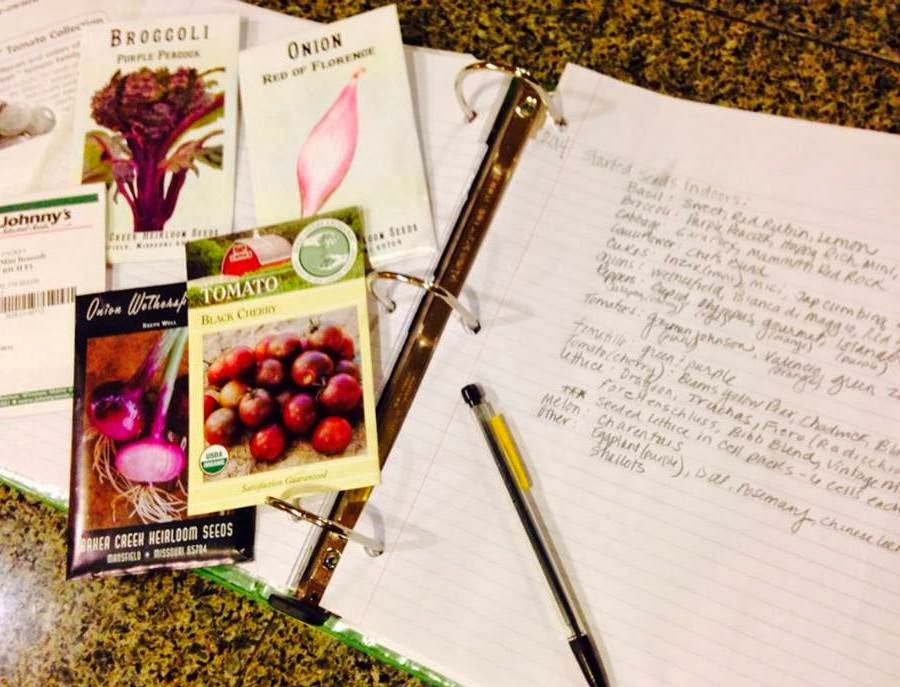
I'll be honest.... When some gardeners welcome the break that cooler weather and winter brings..... I am already dreaming, plotting and planning next year's garden.  My winters are filled with pouring through gardening magazines and seed catalogs (I have a bit of an addiction...), pinning anything garden related (o.k..... another addiction!) , and spending my evenings drawing out next year's veggie plot in my garden notebook!  I'm grateful for a husband that shares my passion for gardening and outdoor projects!  

February marks the start of of a summer filled with flowers, heirloom vegetables and countless trips to our local flower shops and nurseries!  By February 1st -- we have our seedlings started indoors......

For the last few years, I've collected and recycled old produce containers, filled them with a seed-starting mix, and planted my vegetable and flower seeds.  


There are many benefits to these little containers (drainage holes,hinged lids, etc) so they are the perfect little 'greenhouses' for seed starting.

Within the week we had the following sprouting under the grow lights:  Basil, Purple Peacock and Happy Rich Mini broccoli, Caraflex cabbage, Inzik (mini) cukes, Bianca di Maggio and Red of Florence onions, German Johnson and Green Zebra tomatoes, so many varieties of mini-head lettuces, along with peppers, cauliflower, tomatillo and shallots......

This year, I have the honor of growing flowers for my niece's wedding in June.  Wish me luck!  I've got to grow enough flowers to fill at least 25 table centerpieces!!

Here's the plan for this year's cutting garden :
  • Ammi "Green Mist"
  • Bupleurum "Green Gold"
  • Celosia "Ruby Parfait"
  • Cosmos "Double Click Mix", "Summer Dreams" and "Seashell Mix"
  • Eucalyptus "Silver Drop"
  • Aster "Fireworks Mix"
  • Euphorbia "Mountain Snow"
  • Feverfew
  • Gomphrena "Formula Mix"
  • Gysophila "Covenant Garden Mix"
  • Ornamental Kale "Sunrise" and "Sunset"
  • Lisianthus "Arena Red"
  • Nigella "Love in Mist"
  • Poppy "Falling in Love Mix"
  • Salvia "Marble Arch Mix"
  • Scabiosa "Fama White" and "Fama Deep Purple"
  • Zinnia "Envy", "Giants Mix", "Dwarf Mix", White Wedding", and "Queen Red Lime"

Best wishes to you as we put winter to rest and welcome the signs of spring!  

"The Glory of Gardening: hands in the dirt; head in the sun; heart with nature.  To nurture a garden is to feed not just on the body, but on the soul."  Alfred Austin